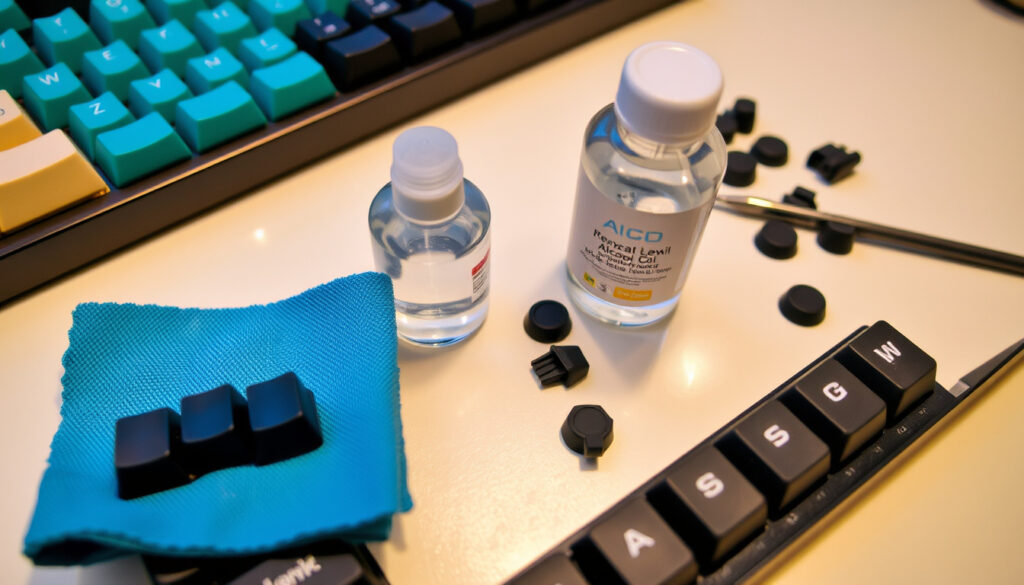
How to Clean Keyboard Keys Safely and Effectively
Your keyboard shouldn’t feel like a science experiment. Sticky keys, a greasy shine on the spacebar, and crumbs wedged between switches are signs it’s time for a proper clean. This guide breaks down exactly how to clean keyboard keys — with the right solvents, the right technique, and the crucial safety rules that keep your keycaps intact.
Bacteria per square inch on keyboard: 20,000 · Users who never clean keyboard: 70% · Lifespan extension from regular cleaning: 2–3 years · Average keyboard cleaning frequency recommended: Every 3 months
Quick snapshot
- Isopropyl alcohol at 70% kills most bacteria and evaporates without residue (HP Tech Takes)
- Removable mechanical keycaps can be soaked in warm soapy water (KeebsForAll)
- Compressed air effectively removes loose debris (HP Tech Takes)
- Long-term effect of vinegar on keycap plastics
- Safety of WD-40 on laptop keyboard membranes
- Effectiveness of glass cleaner on printed key lettering
- This is a maintenance task, not a one-time fix — schedule cleaning every 3 months for best results
- Choose between an alcohol wipe, keycap soak, or compressed-air-only clean based on how dirty the keyboard is
| Label | Value |
|---|---|
| Average bacteria count per square inch | 20,000 |
| Keyboard cleaning frequency (CDC recommendation) | Weekly for shared keyboards |
| Isopropyl alcohol concentration range | 70% to 91% |
| Percentage of keyboard bacteria causing illness | 16% (Staphylococcus aureus) |
What is the best way to clean keyboard keys?
When to remove keys vs. clean in place
- Mechanical keyboards: keycaps are designed to be removed. Pop them off with a keycap puller and clean the caps separately (HP Tech Takes on mechanical keyboard maintenance).
- Membrane and laptop keyboards: keys are not meant to be removed. Cleaning in place with alcohol wipes and compressed air is safer — prying off keys can break the hinges (HP Tech Takes on general keyboard cleaning).
Removing keys gives you a deeper clean, but only if the keyboard design allows it. Forcing a keycap off a membrane board usually breaks the retainer clip — then you’re buying a new keyboard.
Essential tools: compressed air, isopropyl alcohol, microfiber cloth
You need three things: a can of compressed air (HP Tech Takes recommends short, controlled bursts), a bottle of 70% to 91% isopropyl alcohol, and a lint-free microfiber cloth. No paper towels (they leave fibers), no bleach, no glass cleaner (HP Tech Takes on alcohol recommendation). A soft brush can help loosen stubborn dust between rows.
Step-by-step process for a thorough clean
First: unplug the keyboard and remove batteries if wireless. Second: invert the keyboard and tap out loose crumbs. Third: spray compressed air in short bursts across the key rows. Fourth: fold a paper towel corner, dip it in 70% isopropyl alcohol, and wring it out thoroughly — the cloth should be damp, never wet (Corsair Explorer on alcohol application). Fifth: wipe each key surface and the gaps between keys. Sixth: dab up any remaining moisture with a clean paper towel (Corsair Explorer on moisture removal). Seventh: let the keyboard air-dry completely (at least 10–15 minutes) before plugging in (HP Tech Takes on drying time).
Can I clean my keyboard keys with alcohol?
Concentration: why 70% is safer than 90%+
Both concentrations work, but 70% isopropyl alcohol is the Goldilocks choice for disinfecting. The 30% water content slows evaporation enough to let the alcohol penetrate bacterial cell walls, making it a better disinfectant than 91% (HP Tech Takes on alcohol safety). For pure degreasing around switch stems, 90%+ evaporates faster and leaves less moisture near electronics — but 70% is safer for ABS plastic keycaps that can become brittle with high-concentration exposure.
What types of keyboards are alcohol-safe?
Alcohol is safe on PBT and ABS plastic keycaps, which cover nearly all mechanical keyboards and most standard membrane boards. It can remove printed key legends on cheaper keyboards where the lettering is pad-printed or laser-etched onto the surface (HP Tech Takes on legend warning). Test on a hidden key first — if the lettering smudges, switch to a dry brush method only.
How to apply alcohol without damaging electronics
Never spray alcohol directly onto the keyboard. The stream can drip into switch housings or seep under the membrane layer. Instead, dampen the corner of a microfiber cloth until it’s moist, not dripping, then wipe each keycap individually (Corsair Explorer on application technique). For sticky residue around stems, use a cotton swab dipped in alcohol, again squeezed dry first.
A single drip of isopropyl alcohol into a laptop keyboard membrane can dissolve the thin plastic layer under the keys, causing the key to stop registering. The risk isn’t the alcohol — it’s your application method.
How do you pop off keyboard keys?
Using a keycap puller vs. flat tool
A wire keycap puller is the safest option for mechanical keyboards. Press it straight down over the keycap until the wire loops catch under the cap, then pull upward evenly (Corsair Explorer on puller technique). Flat tools like a spudger or plastic pry tool work in a pinch, but they can scratch keycap edges. Never use a metal screwdriver — it will gouge both the cap and the switch housing.
How to remove keys on mechanical vs. membrane keyboards
- Mechanical: each keycap sits on a switch stem and pulls straight off. The spacebar, Enter, and Shift keys have stabilizer wires — remove them last to avoid bending the wire (HP Tech Takes on stabilizer advice).
- Membrane: keycaps are often clipped onto a silicone or rubber dome. They can be pried off gently with a flat tool, but the retainer clip beneath is fragile. Expect a higher breakage rate.
Reassembly tips: aligning and pressing firmly
Before reassembly, take a photo of the keyboard layout with a smartphone — especially if you have a non-standard bottom row (HP Tech Takes on photo tip). Press each keycap straight down until it clicks or sits flush. For stabilizer keys (spacebar, Shift), press on both ends of the cap simultaneously to seat the wire evenly. If the key feels mushy after reinstall, pull it off and check that the stabilizer wire clicked into its slot.
The catch: The most common reinstallation mistake is forcing a keycap at an angle. That bends the switch stem and creates a permanent scratchy feel. Gentle pressure, straight down.
Why do keyboards get so dirty?
Skin oils, food crumbs, and dust
Every time you type, your fingers deposit sebum — the natural oil from your skin — onto the keycaps. Over weeks, that oil mixes with dust particles and dries into a gummy layer that attracts more debris (HP Tech Takes on grime explanation). Food crumbs fall between keys because of the natural gap between keycap and keyboard plate. Crumbs from dry snacks can accumulate for months before causing a sticky key.
Bacterial accumulation and health risks
Studies have found that keyboards can harbor up to 20,000 bacteria per square inch — roughly 400 times more than a toilet seat. About 16% of those bacteria are Staphylococcus aureus, a pathogen that can cause skin infections. Regular cleaning with isopropyl alcohol at 70% kills the vast majority of these organisms (HP Tech Takes on disinfection).
How design contributes to dirt buildup
Keyboards with low-profile keycaps and tight row spacing have less surface area for crumb entry, but the gaps are still large enough for fine dust. Backlit keyboards often have translucent plastic that shows grime more visibly. The bottom row — spacebar, Alt, Ctrl — accumulates the heaviest oil deposits because that’s where palms and thumbs rest.
How do I remove grime from my keyboard?
Using a soft brush or toothbrush
For initial grime, a soft-bristled toothbrush (dry, no liquid) can dislodge particles from between keys. Sweep the brush at a 45-degree angle across the key rows, then invert the keyboard and tap the debris out. This method catches loose material before it gets pushed deeper by wipes (HP Tech Takes on compressed air alternative).
Isopropyl alcohol wipes for sticky residue
Sticky residue on keys is usually dried sugar (from soda, juice, or energy drinks) mixed with oil. Alcohol breaks down both the sugar crystals and the oily binder. Use a pre-moistened isopropyl alcohol wipe or dampen your own cloth — the key is low moisture so the liquid doesn’t seep under the keycap. Wipe each sticky key individually, then follow with a dry section of the cloth (Corsair Explorer on wipe technique).
Deep cleaning with keycap removal and soapy water
For heavy oil and gunk, remove the keycaps (if your keyboard allows it) and place them in a bowl of warm water with a drop of dish soap. Soak for 30 to 60 minutes — the warm water and soap break down the oil layer (KeebsForAll soak guide). Agitate gently with a soft cloth, then rinse with clean water. Let them dry completely on a towel overnight (Computer Station Nation on drying recommendation). Excessive moisture near the switch stems is the fastest way to ruin a mechanical keyboard. Use 90%+ isopropyl alcohol on a cotton swab to clean around the switch stems themselves (Computer Station Nation on 90% alcohol tip). The risk: any moisture left in the switch housing can cause intermittent key chatter within days.
Related reading: how to clean and maintain a mechanical keyboard · how to clean keyboard
geekhack.org, thecleantips.com, kineticlabs.com, wikihow.com, pcbuildadvisor.com, lifetips.alibaba.com, melgeek.com
Frequently asked questions
Can I use vinegar to clean my keyboard?
Vinegar is acidic (acetic acid, pH 2–3) and can etch plastic keycaps over time, especially on printed legends. It also leaves a residue that attracts more dust. Isopropyl alcohol is safer and more effective for electronic cleaning.
Is acetone just isopropyl alcohol?
No. Acetone and isopropyl alcohol are chemically different. Acetone dissolves ABS plastic — the material used in most keycaps — and will melt or yellow them permanently. Isopropyl alcohol is safe for nearly all keycap plastics (HP Tech Takes on solvent warning).
Does nail polish stay on keys?
Nail polish remover is acetone-based and will strip keycap coatings and melt plastic. Nail polish itself, if dripped onto a key, creates a hard layer that is difficult to remove without damaging the cap. Avoid both near the keyboard.
How to fix a greasy keyboard?
Grease is skin oil. Wipe periodically with a microfiber cloth dampened with 70% isopropyl alcohol. For mechanical keyboards, removing and soaking keycaps in warm soapy water removes even thick oil buildup. Repeated greasiness can be reduced by washing hands before typing.
Can I use glass cleaner to clean a keyboard?
Glass cleaner contains ammonia or other harsh detergents that can damage keycap surfaces and remove printed lettering. Stick to isopropyl alcohol at 70% or a mild soapy cloth for any surface above the keys.
Is WD-40 contact cleaner safe for laptop keyboards?
WD-40 Specialist Contact Cleaner is designed for electronic contacts and does not leave a lubricating residue. It can be used on switch contacts inside a desktop mechanical keyboard, but it is not a cleaning solution for keycaps or membrane surfaces — it offers no benefit over alcohol and risks overspray onto laptop components.
Can I use nail polish remover instead of rubbing alcohol to clean my keyboard?
No. Nail polish remover is primarily acetone. Acetone dissolves ABS plastic keycaps and any painted or printed legends. Even brief contact can cause permanent damage. Use 70% isopropyl alcohol only (HP Tech Takes on acetone warning).
Related reading: how to clean and maintain a mechanical keyboard · how to clean keyboard
More related posts
 Dunnes Stores Waterproof Jackets: Vs Gore-Tex Comparison
 Last Minute World Book Day Costumes: 50+ Easy DIY Ideas (2026)
 Cast of Playing Nice: Full List of Actors and Characters
 ASEAN All-Stars vs Man United: Score, Lineups & Reaction
 Cancer White Spots on Skin: What They Look Like & When to Worry
 Power City Near Me: Store Locator & Hours (2025)
 Mother’s Day 2026: UK & US Dates Explained
