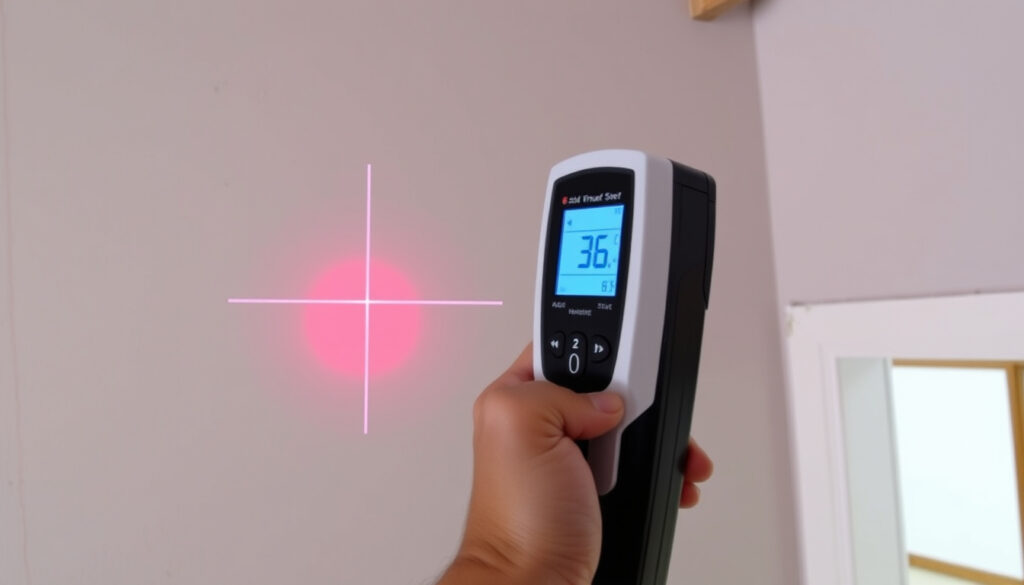
How to Use a Stud Finder: Step-by-Step Guide & Troubleshooting
A stud finder that beeps at the wrong spot is worse than no stud finder at all — it can lead to botched TV mounts and unnecessary drywall repairs. This guide cuts through the guesswork with step-by-step calibration, troubleshooting tables, and the real differences between electronic and magnetic finders.
Typical stud spacing in US homes: 16 or 24 inches apart. Common stud finder type: magnetic or electronic. Accuracy of electronic stud finders: up to 1/4 inch. Depth of detection for standard models: up to 1.5 inches drywall.
What a Stud Finder Does
- Detects wooden or metal studs behind drywall — Lowe’s how-to guide
- Alerts with beep, light, or both — Harbor Freight guide
- Essential for safely mounting heavy objects — Popular Mechanics comparison
Common Stud Finder Types
- Magnetic: detects screws/nails — The Wearify guide
- Electronic: senses density changes — Harbor Freight guide
- Deep-scan: detects through thicker materials — Popular Mechanics comparison
When to Use a Stud Finder
- Hanging shelves, TVs, or mirrors — Lowe’s how-to guide
- Mounting cabinets or towel bars — Homebuilding & Renovating
- Before drilling to avoid wires or pipes — Zircon Help Center
Key Facts at a Glance
| Standard stud spacing in US homes | 16 inches on center |
| Maximum detection depth for typical electronic finder | 1.5 inches |
| Accuracy of most electronic stud finders | ± 1/4 inch |
| Number of studs in an 8-foot wall | 6 at 16-inch spacing |
When a stud finder beeps, what does that mean?
The beep pattern tells you what the sensor has found. Electronic stud finders emit a tone when they detect a change in wall density, which typically indicates the edge or center of a stud. Magnetic finders click or vibrate when they locate a metal fastener — the screw or nail holding the drywall to the stud.
Difference between magnetic and electronic beep patterns
Magnetic stud finders are passive. They contain a magnet that reacts to steel nails or screws. When you slide one across the wall, you’ll feel a pull and hear a click — that’s the magnet locking onto a fastener. Electronic stud finders, by contrast, actively sense changes in dielectric constant. They beep when the capacitance shifts from hollow wall to denser stud material. According to Lowe’s how-to guide, the beep signals that you’ve reached the edge or center of the stud, depending on the model.
What a continuous beep indicates
A continuous beep — one that doesn’t stop as you move — usually means the finder is picking up something else entirely. This could be a live electrical wire, a metal pipe, or metal lath behind the drywall. Zircon’s Help Center warns that metal lath or foil-backed insulation causes false positives. If your finder beeps nonstop, move to a different section of the wall and recalibrate.
The implication: A single beep is good news — it means you found a stud. A continuous beep means something else is interfering.
How accurate are wall stud finders?
Electronic stud finders from major brands are accurate to within ± 1/4 inch under ideal conditions. But accuracy drops when drywall is thicker than 1.5 inches, when the wall has metal lath, or when the finder isn’t calibrated properly.
Factors that affect accuracy
Several variables reduce accuracy. Thick drywall, tile, or plaster dampens the sensor’s ability to detect density changes. Popular Mechanics notes that lower-depth mode helps on single-sheet drywall, while deeper penetration may be needed for multilayer walls. Metal lath or foil-backed insulation creates false positives — the finder sees metal everywhere. Zircon’s Help Center adds that you must not touch the wall with your free hand during scanning, as it affects accuracy.
Accuracy claims from major brands
Lowe’s guide states that the tool will indicate whether it is calibrated or whether you need to move and try again. Zircon UK FAQ reports that calibration must be done on the surface being scanned for successful stud finding. Harbor Freight confirms that electronic and multi-sensor stud finders require calibration before scanning.
The pattern: Accuracy is only as good as your calibration and wall conditions.
Is there a trick to using a stud finder?
Yes, and the trick is calibration. Most errors come from skipping this step or doing it wrong.
Calibrating on the wall before scanning
Place the stud finder flat against a section of wall you believe is hollow — at least 300 mm (about 12 inches) away from any expected stud, per Sparky Direct. Then press and hold the power button. The tool calibrates to the wall surface. Zircon’s FAQ says to hold the button so the tool automatically calibrates. Zircon Corporation instructs: put the tool on the wall first, then press and hold the button. Do not move the tool during calibration.
Engineer Fix warns that calibrating over a stud makes the stud become the baseline reading, so the finder will think everything else is a stud. Move to a clear section if you suspect this happened.
Marking both edges for center
Once the finder beeps, mark that spot. Continue sliding until the beep stops, then mark again. The center of the stud is halfway between those two marks. Homebuilding & Renovating reports that holding the device flat and moving it slowly — about 1-2 inches per second — without lifting helps avoid missing studs.
Using multiple passes
House Digest recommends scanning the same area several times with varying patterns and overlapping passes to confirm a hit and reduce false positives. One pass from left to right, a second from right to left, and a third one inch above or below the first line. If all three mark the same area, you’ve found a stud.
The catch: Marking edges and confirming with multiple passes is the only way to reliably find the stud center.
What can throw off a stud finder?
Several common wall materials and hidden objects cause false readings. Knowing what they are saves time and prevents frustration.
Metal pipes and electrical wires
Electronic stud finders that detect live AC wires will beep when they pass over energized electrical cables. Metal pipes also trigger a density change. The Wearify guide notes that electronic finders often detect live wires. If your finder beeps and you suspect wiring, use a non-contact voltage tester to confirm before drilling.
Thick or textured drywall
Thick drywall, tile backer board, or textured plaster reduces the sensor’s effective depth. Popular Mechanics advises using the deep-scan mode (if available) for multilayer walls. If the finder shows no reading, the stud may be too deep for the sensor to reach.
Metal studs vs. wood studs
Both magnetic and electronic finders work on metal studs, but magnetic finders detect screws, not the stud itself. Electronic finders detect the metal stud as a change in density. Lowe’s guide says most modern electronic finders work on metal studs, but calibration is critical.
What this means: If you’re in a newer commercial building with metal studs, a magnetic finder may be less reliable than an electronic one with a metal-scan mode.
False positive warning: Metal lath in older plaster walls will make most electronic stud finders beep continuously because they register the metal mesh as a solid object. Use a magnetic stud finder on these walls instead.
Can I use my phone as a stud detector?
Phone apps can detect metal fasteners, but they are not a replacement for a dedicated stud finder.
How magnetic sensor apps work
Phone apps use the internal magnetometer to detect ferrous metal — the screws or nails in the wall. The Wearify guide says magnetic finders are passive, need no batteries, and locate steel nails or screws rather than stud edges or centers. Phone apps work the same way.
Limitations compared to dedicated stud finders
Phone apps cannot detect wood studs directly. They only locate the metal fasteners in the stud. If the drywall screws are spaced far apart or covered by spackle, the app may not register them. The Wearify guide confirms that magnetic finders work on almost any wall surface but only pinpoint the fastener, not the stud’s edge or center. Dedicated electronic finders are more accurate and provide edge detection.
The catch: A phone app can be a quick check, but for precision work — like mounting a TV — use a dedicated stud finder.
Step-by-Step Guide: How to Use a Stud Finder
Follow these steps for reliable results.
- Choose your tool. Select an electronic stud finder for edge detection and wire sensing. Use a magnetic finder for plaster walls or when you don’t need edge precision. Popular Mechanics provides a comparison of both types.
- Prepare the wall. Remove any objects from the area. Keep your free hand away from the wall during calibration and scanning, per Zircon’s Help Center.
- Calibrate. Place the finder on a section of wall you believe is hollow. Press and hold the power button. Do not move it until calibration completes. Zircon Corporation says to put the tool on the wall first, then press the button.
- Scan slowly. Slide the finder horizontally across the wall at about 1-2 inches per second. Homebuilding & Renovating notes that moving slowly prevents missing studs. Keep the finder flat and level.
- Mark edges. When the finder beeps or lights up, mark that spot. Continue until the beep stops, then mark again. The stud center is halfway between the two marks.
- Confirm with a second pass. Slide the finder again one inch above or below your first scan. House Digest says overlapping passes reduce false positives.
- Use a finishing nail to verify. If you’re unsure, poke a very small hole at the center mark with a finishing nail to confirm you hit the stud.
Pro tip: Always calibrate on the surface you’re scanning. If you move to a different wall — say from a hollow interior wall to an exterior wall with thicker drywall — recalibrate. Zircon’s Help Center states that calibration must be done on the surface being scanned for successful stud finding.
Common Stud Finder Mistakes
- Skipping calibration. The most common error. Always calibrate on a hollow section of the same wall. Harbor Freight says calibration is required for electronic finders.
- Moving too fast. Sliding too quickly means the sensor misses the density change. Homebuilding & Renovating recommends 1-2 inches per second.
- Touching the wall with your free hand. Your hand affects the capacitance reading. Zircon’s Help Center explicitly warns against this.
- Ignoring false positives. Metal lath, pipes, and wires cause false beeps. Use a magnetic finder as a cross-check if you’re unsure.
- Not marking edges. Relying on the beep for center is less accurate than marking both edges. Lowe’s guide emphasizes marking edges.
Bottom line: Use an electronic stud finder for edge detection and wire sensing. Always calibrate on a hollow section of the same wall you’re scanning. Mark both edges to find center, and confirm with multiple passes. If your finder beeps continuously, recalibrate away from studs — a failure to calibrate correctly means you’ll miss the stud entirely.
Stud Finder Troubleshooting
| Problem | Likely Cause | Fix |
|---|---|---|
| Finder beeps continuously | Calibrated over a stud, or metal lath/foil-backed insulation present | Move to a hollow section at least 300 mm away and recalibrate. Use magnetic finder on metal lath walls. |
| Finder won’t calibrate (error beep) | Started over a stud, or device is not flat on wall | Move a few inches left or right and try again. Zircon UK FAQ suggests this fix. |
| No beep anywhere on wall | Thick drywall, tile, or plaster beyond detection depth | Use deep-scan mode if available. Try a magnetic finder to locate screws. |
| Inconsistent readings on same area | Moving too fast, or free hand touching wall | Slow down to 1-2 inches per second. Remove free hand from wall. |
| Finder marks a stud, but there’s nothing there | False positive from wire, pipe, or metal lath | Cross-check with a magnetic finder or verify with a small pilot hole. |
The pattern: Most stud finder problems trace back to calibration errors or interfering wall materials.
Frequently Asked Questions
How do I calibrate my stud finder?
Place the finder flat against a section of wall you believe is hollow — at least 12 inches from any expected stud. Press and hold the power button. Do not move the tool until it indicates calibration is complete. Zircon Corporation says to put the tool on the wall first, then press the button.
Can a stud finder detect wires?
Some electronic stud finders can detect live AC wires. They beep when they pass over an energized cable. The Wearify guide notes this feature. Always use a non-contact voltage tester to confirm before drilling.
What does it mean if my stud finder beeps without stopping?
It usually means the finder is picking up metal lath, foil-backed insulation, or a live wire. Move to a different section of the wall and recalibrate away from studs. If the beeping continues, switch to a magnetic stud finder.
Do all stud finders work on metal studs?
Most modern electronic stud finders work on metal studs, but calibration is critical. Magnetic finders detect the screws in metal studs, not the stud itself. Lowe’s guide confirms electronic finders are compatible.
How do I find a stud if my finder isn’t working?
Try a magnetic stud finder — it’s passive and detects screws without calibration. You can also knock on the wall: a hollow sound means empty space, a solid thud means a stud. Measure 16 or 24 inches from a corner, as studs are usually spaced at those intervals in US homes.
Is it safe to drill without a stud finder?
Drilling without a stud finder risks hitting electrical wires or pipes. Zircon’s Help Center advises always scanning first. If you must drill without one, use a stud finder app as a rough guide and drill slowly with a small bit.
What is the best stud finder for beginners?
An electronic stud finder with edge detection and a wire-sensing mode is the most beginner-friendly. Look for models from reputable brands that include clear calibration instructions. Magnetic finders are cheaper but require marking fastener locations.
How do I use a stud finder on a textured wall?
Textured walls (popcorn, orange peel) can make it harder for the finder to maintain flat contact. Place the finder flat and hold it steady during calibration. Slide it slowly across the surface. If the texture causes false readings, use a magnetic finder instead.
“If a Zircon tool reports a calibration error or starts over a stud, it may beep intermittently and flash lights, and the user should move a few inches left or right and recalibrate.”
— Zircon UK FAQ
“Homebuilding & Renovating reports that a common best practice is to hold the device flat against the wall and move it slowly and horizontally without lifting it.”
— Homebuilding & Renovating
How to Clean Window Screens: Simple Methods and Hacks — another practical home maintenance guide. How to Clean Keyboard Keys Safely and Effectively — a how-to for maintaining your tools.
“Zircon’s troubleshooting guidance says to put the tool on the wall first, then press and hold the button to start scanning.”
— Zircon Corporation
The final takeaway: A stud finder is only as reliable as its calibration and the person using it. Master these steps, and you’ll never miss a stud again.
More related posts
 Marks & Spencer Ireland Online: Status, Delivery & Discounts
 At the Races Today: Results, Tips, Live Coverage & Entries
 Kidney Stones Symptoms in Women: First Signs & Pain Guide
 What Is Hyrox Training? Format, Prep & CrossFit Comparison
 Premier Inn Near Dublin: Best Locations in City Centre
 What Sport is on Today? Ireland TV Guide & Listings
 Sky Sports Premier League: Cost, Packages & How to Watch in 2025
 Weather New York City – Warm Start to Chilly Shift Ahead
